
Creating a Dynamic HTML Table and PDF Document Generation Flow in Power Automate
Introduction:
Power Automate empowers users to automate
workflows seamlessly across various applications and services. In this
tutorial, we'll guide you through the creation of a dynamic flow that generates
an HTML table with images from Dataverse and converts it into a PDF document.
Although the flow showcases six images, we will focus on one image for
simplicity.
Prerequisites:
- Power
Automate account.
- Access
to a Dataverse environment with the necessary entities.
- A
OneDrive for Business account for PDF document storage.
Steps:
Step 1: Create a New Flow
- Log in
to Power Automate and initiate a new flow.
- Choose the "Instant - from blank" template for a manual trigger.
Step 2: Define Trigger
- Add a
"Manual" trigger and configure it to receive a text input,
representing the key to query Dataverse records.
- Define
the schema with a "text" property.

Step 3: Connect to Dataverse
- Add an
action to list records from Dataverse using the
"OpenApiConnection" type.
- Configure
the connection to the Common Data Service for Apps.

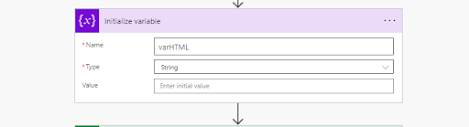
Step 4: Initialize Variables
- Add an
action to initialize a string variable to store HTML content.
Step 5: Loop through Dataverse Records
- Add a
"Foreach" action to iterate through the Dataverse records
obtained.
- Inside
the loop, append HTML content for each record to the variable.

Step 6: Append HTML Table records to the string variable
- Add a "Append to string variable" action to iterate & append the Dataverse records obtained.

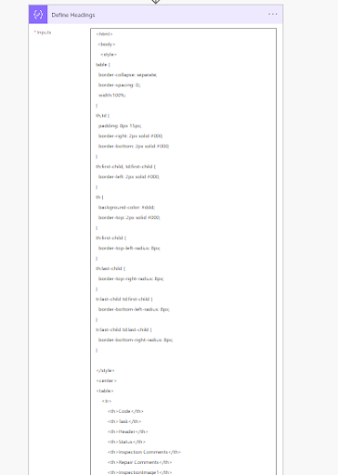
Step 6: Define HTML Table
- Add a "Compose" action to define the HTML table structure with headings and the appended content.
"Compose" action responsible for creating the HTML structure that defines the table headings. Let's break down this action to understand its purpose and the HTML code it generates.

Step 7: Create HTML File
- Add an
action to create an HTML file in OneDrive for Business using the
"CreateFile" operation.

Step 8: Convert HTML to PDF
- Add an
action to convert the created HTML file to a PDF.

Step 9: Create PDF File
- Add
an action to create the final PDF file in OneDrive for Business.


Conclusion: This Power Automate flow dynamically
generates an HTML table with images from Dataverse and converts it into a PDF
document. Customize the flow to fit your specific requirements, handling
multiple images and additional data from Dataverse.
how to handle the large photo size?
ReplyDelete