
In today's fast-paced world, automated processes can be a
lifesaver. Microsoft Power Automate offers a powerful toolset for streamlining
various tasks. In this blog, we'll guide you through the process of sending
out-of-box (OOB) emails using Power Automate. What makes this process even more
interesting is our use of a custom table to manage email recipients. We'll take
you through the necessary steps to set up this efficient and automated email
communication system.
Step 1: Creating a Custom Table
Our journey begins with the creation of a custom table. This
table will serve as the repository for email recipients, offering a structured
approach to email management within Power Automate.
- Access
Power Automate:
Log in to your Power Automate account and navigate to the environment where you want to create the custom table. - Create
a Custom Table:
Go to "Data" and select "Tables." - New
Table:
Click "New Table" to create a new custom table. - Table
Properties:
Configure the table properties, making sure to select the checkbox designating this table as an option when creating a new activity. and the records of this table can have a email contact.

Step 2: Adding an Email Column
With your custom table created, you'll need to add an email
column. This column will house the email addresses of your recipients.
- Edit
the Table:
Select your newly created custom table, then click "Edit Table." - Add
a Column:
Click "Add Column" and name it "Email" with the data type set to "Email." - Save
Changes:
Be sure to save your changes.

Step 3: Populating the Custom Table
Now that your custom table and email column are in place,
you can begin populating it with email addresses. Each row in this table
represents an email recipient, and we will use a checkbox to identify rows with
valid email contacts.
- Add Rows: Click on "Add Rows" to start filling in the table with email addresses.
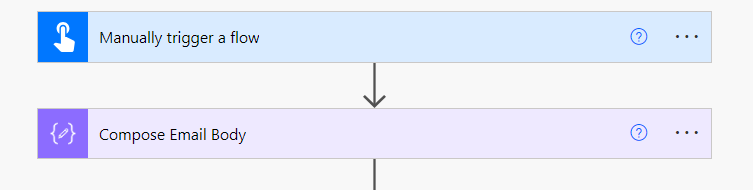
Step 4: Creating the Power Automate Flow
With your custom table set up and populated with email
contacts, it's time to create the Power Automate flow that will send emails to
these recipients. Here's a more detailed outline of the steps you mentioned:
- Compose Email:
Add a "Compose" action for your email body. - Get
Sending User:
Add a "List rows" action for your custom table to fetch the user who will be sending the email. You can apply a filter to get the desired user.
- Condition:
Add a "Condition Action" to check if length of users returned is greater than 0. - List
Custom Table Records:
Add another action to list the custom table records using the "List rows" action. - Apply
to Each:
Wrap the subsequent actions within an "Apply to Each" loop to iterate through each record in the custom table. - Add
New Row:
Inside the loop, add an action to add a new row in the "Email Messages Table." Configure the activity parties, subject, and description of the email message.
Here's the JSON:
[
{
"participationtypemask": 1,
"partyid@odata.bind": "systemusers(GUID)"
},
{
"participationtypemask": 2,
"partyid@odata.bind": "CustomTableLogicalName(GUID)"
}
] - Perform
a Bound Action:
Add another action to perform a bound action. Choose "Email Messages" and "SendEmail" in the action. Set "IssueSent" to "Yes" to mark the email as sent.


Step 5: Save and Test
Once you have set up your Power Automate flow, save it and
test it with some sample data to ensure it's functioning as expected. If
everything checks out, you're ready to use this automation to send out-of-box
emails using a custom table as your recipient list.
This Power Automate solution simplifies the process of
sending emails to multiple recipients by leveraging a custom table to manage
and store email addresses. By following these steps, you can ensure that your
communications reach the right people efficiently and with minimal manual
effort, saving you time and reducing the chances of errors in your email
outreach.
Comments
Post a Comment